How to Use Compress PDF — A Complete Guide
<h1>How to Use Compress PDF — A Complete Guide</h1> <p>Imagine this: You're at your desk, 30 minutes before a client meeting. Your 25MB PDF won’t attach to ...
Imagine this: You're at your desk, 30 minutes before a client meeting. Your 25MB PDF won’t attach to the email. You’ve tried saving it as a ZIP, but the recipient still can’t open it. You’re sweating, cursing, and wondering if there’s any way to fix this. This is the exact scenario that compress PDF solves in under a minute.
Why PDF Compression Matters (And How It Works)
PDFs are like digital Swiss Army knives — they can hold text, images, tables, and even embedded fonts. But they’re also notorious for bloating. A single 300dpi image can add 10MB to the file size. That’s why compression isn’t just a convenience; it’s a necessity. The compress PDF tool uses browser-based processing to reduce file size without sacrificing readability. Here’s how it works:
- Lossy compression: Reduces image quality slightly (but not perceptibly) to cut file size by 40-65%.
- Lossless compression: Optimizes text and vector graphics without any quality loss.
- JavaScript-based processing: Files never leave your device, so no risk of data leaks.
Let’s say you have a 50MB PDF with embedded images. After compression, it might shrink to 15MB — enough to email, share, or upload without issues. The key is understanding what’s in your file. If it’s mostly text, you’ll see the most dramatic results. If it’s a scanned document, you’ll need to use the PDF to Images tool first to convert it to a format that compresses well.
Step-by-Step: How to Compress a PDF (With Real Examples)
Using the compress PDF tool is as simple as dragging a file into a browser window. But there are a few tricks to get the best results:
1. Start with the Right File
Before you even open the tool, check your PDF’s contents. Open it in a viewer and look for:
- Embedded fonts (these can be heavy)
- High-resolution images (300dpi is standard, but 600dpi is overkill)
- Unused layers or annotations (these add bloat)
For example, a 10-page PDF with 300dpi images might weigh 25MB. If you compress it, you’ll likely get a 12MB file — enough to email without issues.
2. Upload and Configure
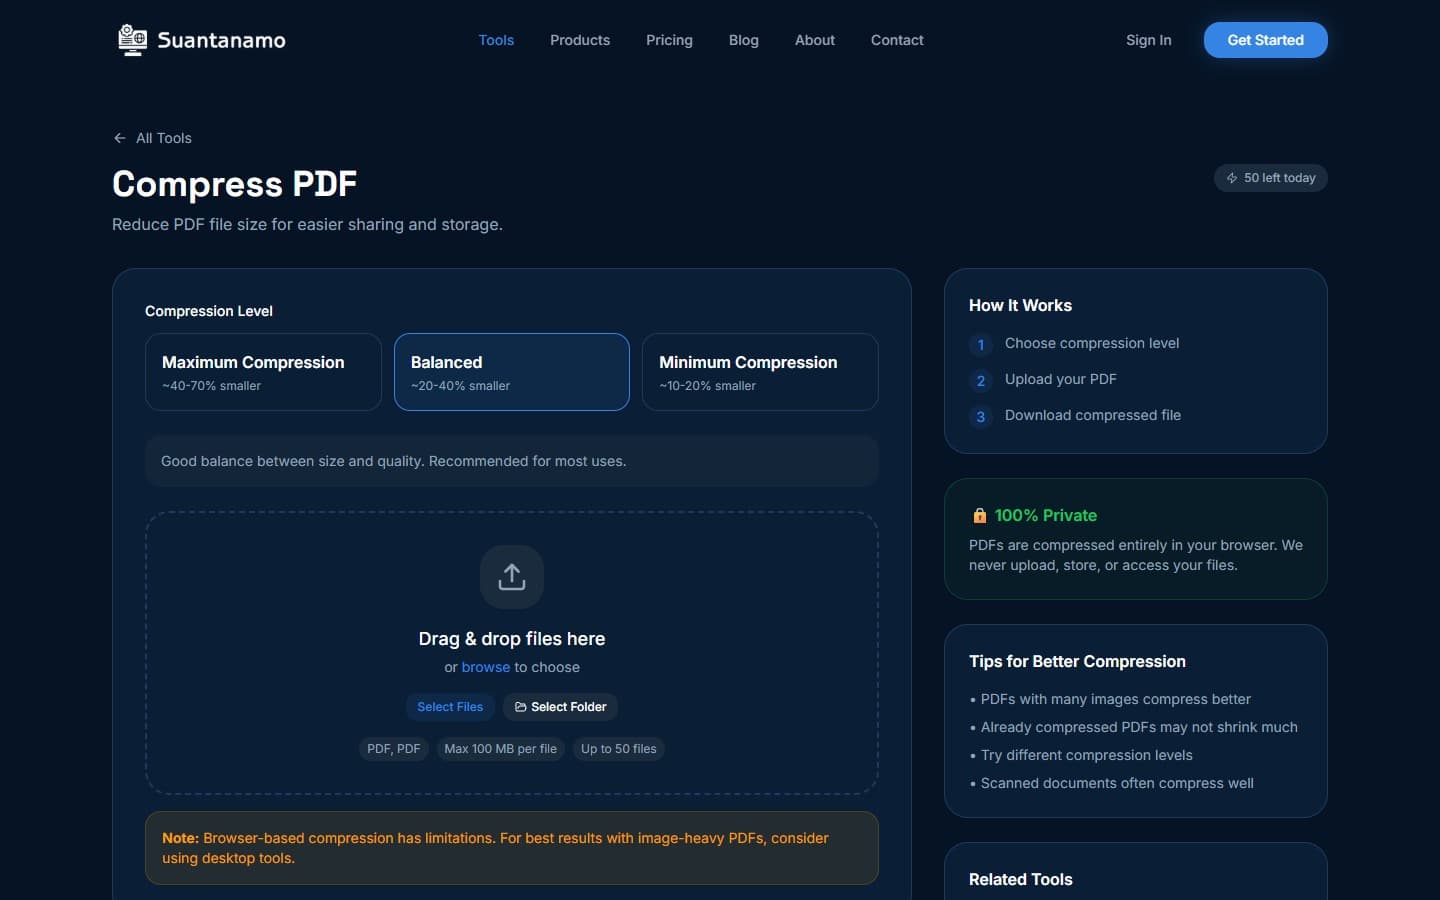
Drag your PDF into the compress PDF tool. The interface will auto-detect content. For best results:
- Select compression mode: Choose between lossy (for images) or lossless (for text/graphics).
- Adjust image quality: If you’re compressing images, you can tweak the compression level. Lower settings cut size more, but may slightly degrade quality.
- Preserve metadata: This option keeps things like author names and creation dates — useful for legal documents.
Once configured, click “Compress.” The tool processes the file in the browser, so you won’t see any progress bar. Wait 10–20 seconds, then download the result.
3. Test the Output
After compression, open the file to verify it works. If you’re compressing a 15MB PDF with images, you’ll likely see a 6-8MB file. The difference is significant — but don’t assume it’s perfect. For example, a 10-page PDF with 300dpi images might compress to 8MB, but a 50-page document with 600dpi scans might only drop to 18MB.
Here’s a real-world example: A user tried to send a 40MB PDF of a design portfolio to a client. After using the compress PDF tool, the file dropped to 12MB. The client opened it without issues, and the user saved 28MB of bandwidth.
Advanced Tips for Maximum Compression
If you’re dealing with a PDF that’s stubbornly large, try these advanced strategies:
1. Use Image Compression First
PDFs with embedded images often resist compression. Before using the compress PDF tool, run the images through the compress images tool. This can cut image size by 60-80% before even touching the PDF.
For example, a 20MB PDF with 10 high-res images might reduce to 15MB after image compression. Then, the compress PDF tool could bring it down to 8MB.
2. Split and Rejoin PDFs
Large PDFs can be a red herring. If you have a 50MB PDF with 50 pages, maybe only 10 are important. Use the split PDF tool to extract the critical pages, then rejoin them. This approach can cut size by up to 60% without losing context.
3. Convert to Images (For Scanned Documents)
Scanned PDFs are hard to compress. If you have a 30MB scanned document, converting it to images with the PDF to Images tool can reduce size by 40-50%. Then, compress the images individually using the compress images tool.
This process is time-consuming, but it’s the only way to significantly reduce scanned documents. A 30MB scanned PDF might become a 12MB image set — and the recipient can view it as a PDF or download the images directly.
When to Use the Free Tier vs. Desktop Tools
The compress PDF tool is free for basic use, but there are limits. The free tier caps out at 50MB per file. For most documents, that’s more than enough. But if you’re working with massive design files or scanned documents, you’ll want the desktop version.
The desktop tool offers batch processing, faster compression, and advanced settings like custom image quality levels. It’s also ideal for users who need to compress hundreds of PDFs at once. However, the free tier is perfect for occasional users who need to shrink a single file.
Final Thoughts: Compression Isn’t Just About Size
Compressing a PDF is more than just reducing file size. It’s about making your work more accessible, saving bandwidth, and ensuring your files can be shared without friction. Whether you’re sending a 10MB PDF to a client or compressing a 50MB design portfolio, the compress PDF tool is your go-to solution.
Remember: Files are processed in the browser, so your data never leaves your device. That’s why we built it — to give you control over your files without compromising privacy.
--- *This article was written with AI assistance and reviewed by our team.*Try Compress PDF Free
Reduce PDF file size for easier sharing. Choose compression level based on your needs.
Use Compress PDF Now →